Recently, I’ve been answering a lot of questions on the A Cloud Guru forums where students were having difficulty going through the lessons and having to set up WordPress. After going through that, I decided maybe it was time I started blogging. After experiencing the process of setting up RDS and EC2 instances a couple of times (and knowing the cost of running them for the life of the blog), I started to research if there were any Serverless-based options available.
This is where Hexo comes in to play. Hexo provides you with the capability to write your blog using Markdown as the document source. No more needing to be logged in to WordPress Admin console to write your blog entries. You can author the document in your favorite IDE and commit the code to source control. Doesn’t this sound awesome? Let’s dive in and see how easy it is to set up.
Requirements
To get started, you will need to have Node.js & Git installed on your computer.
Hexo
Once Node.js is installed, run the following to install Hexo CLI:
1 | $ npm install hexo-cli -g |
Now create a new project:
1 | $ hexo init <your_blog_name> |
Next, modify the blog global settings file, _config.yml
1 | # Site |
You’re now ready to start the local server:
1 | $ hexo server |
This is hosted at http://localhost:4000. When you pull this up in your browser, you’ll see Hexo’s canned “Hello World” test post:
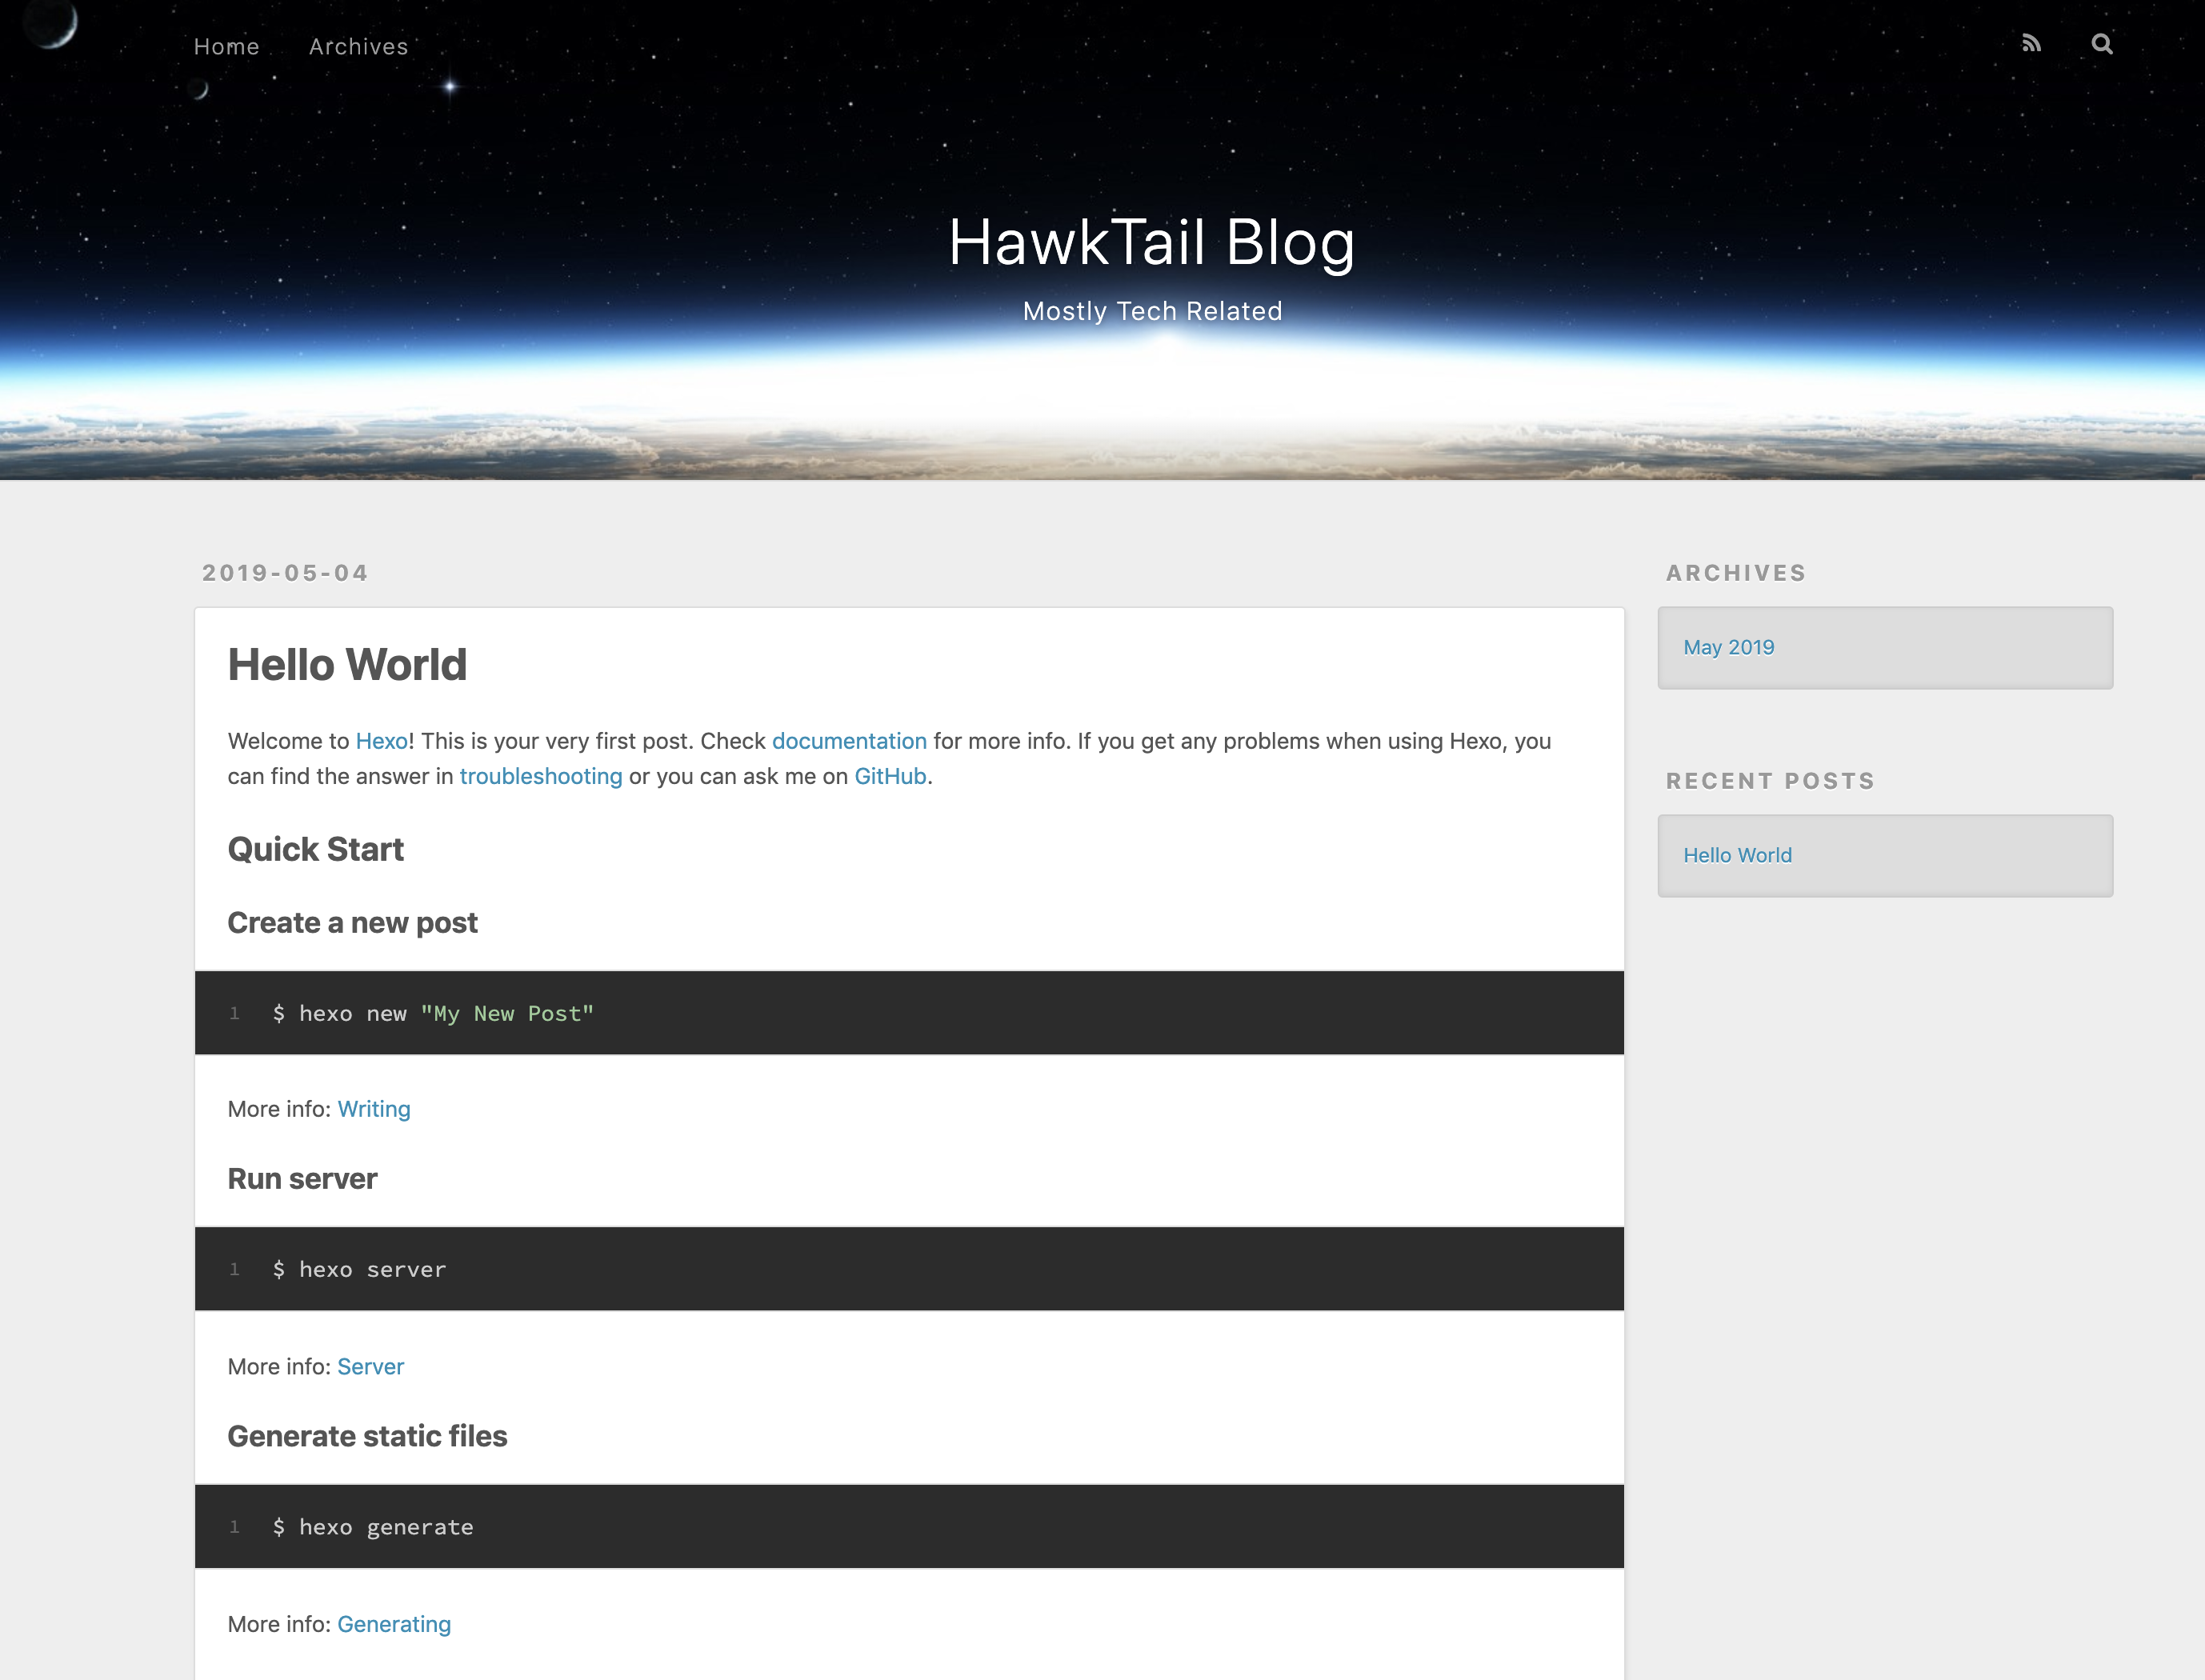
If you prefer something other than the default (landscape) theme, you can find something different on the Hexo Themes page. I haven’t had time yet to look through them all, so I’ve left mine as the default.
You’re almost done with the blog setup, now let’s create your first article. To start a new article, enter the following:
1 | $ hexo new TITLE |
If you want spaces in your title, be sure to put the entire title in double quotes, “How I Made This Blog”
AWS
If you use Terraform, skip to these instructions
Now that the blog pieces are in place, it’s time to tackle the AWS side of things. Log in to the AWS Management Console and navigate to the S3 Dashboard. Create an S3 Bucket, give it a globally unique name and select a region.
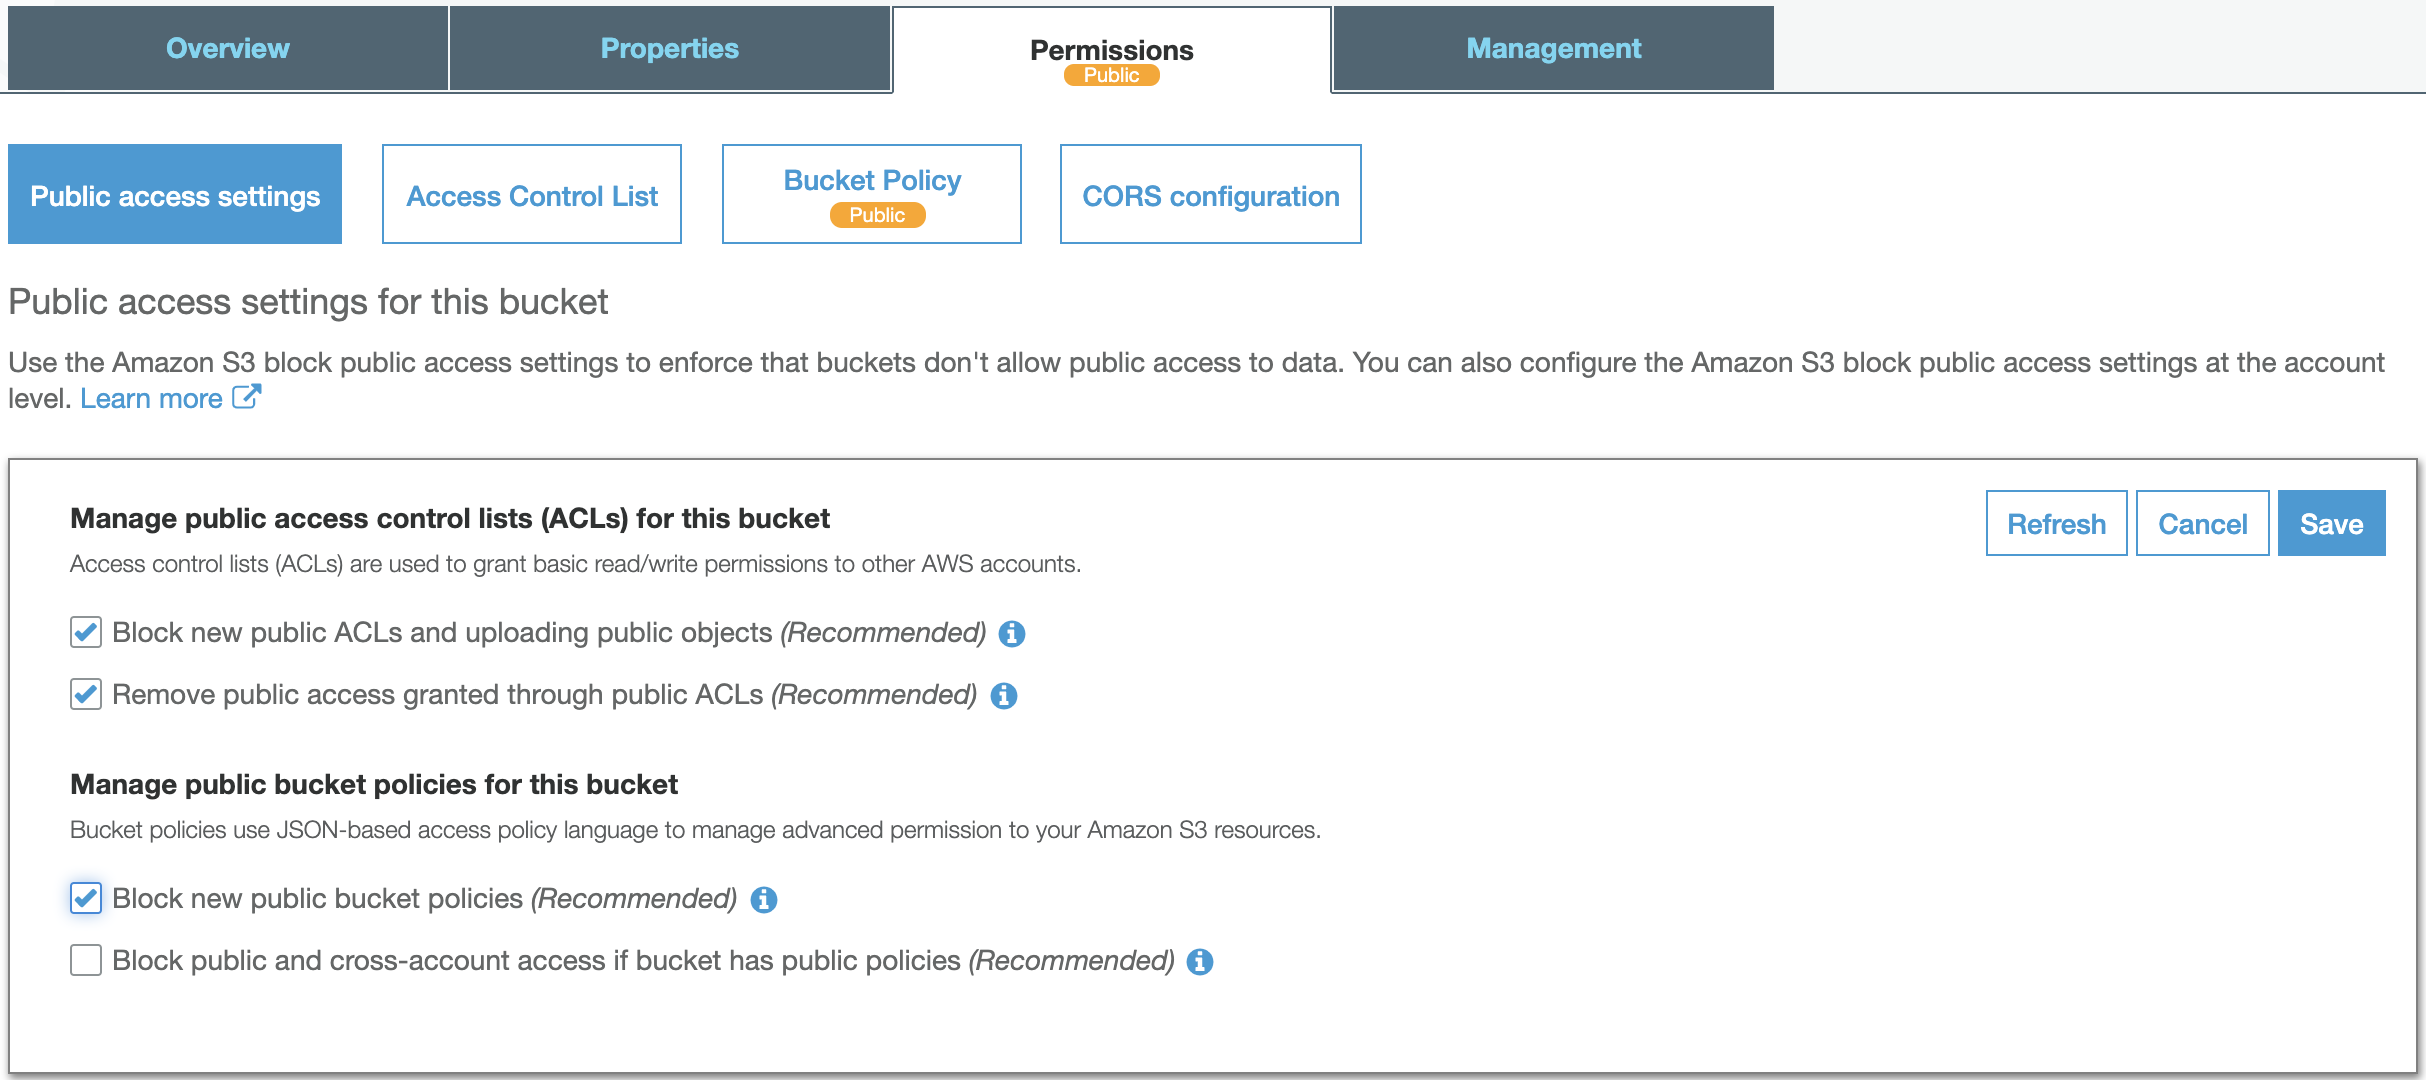
After creating the bucket, click on the link for it and open the Permissions tab. While on the screen for “Public access settings”, click the Edit button. Uncheck the following and click Save.
- Block new public bucket policies
- Block public and cross-account access if bucket has public policies

You will need to type confirm being able to click on Confirm
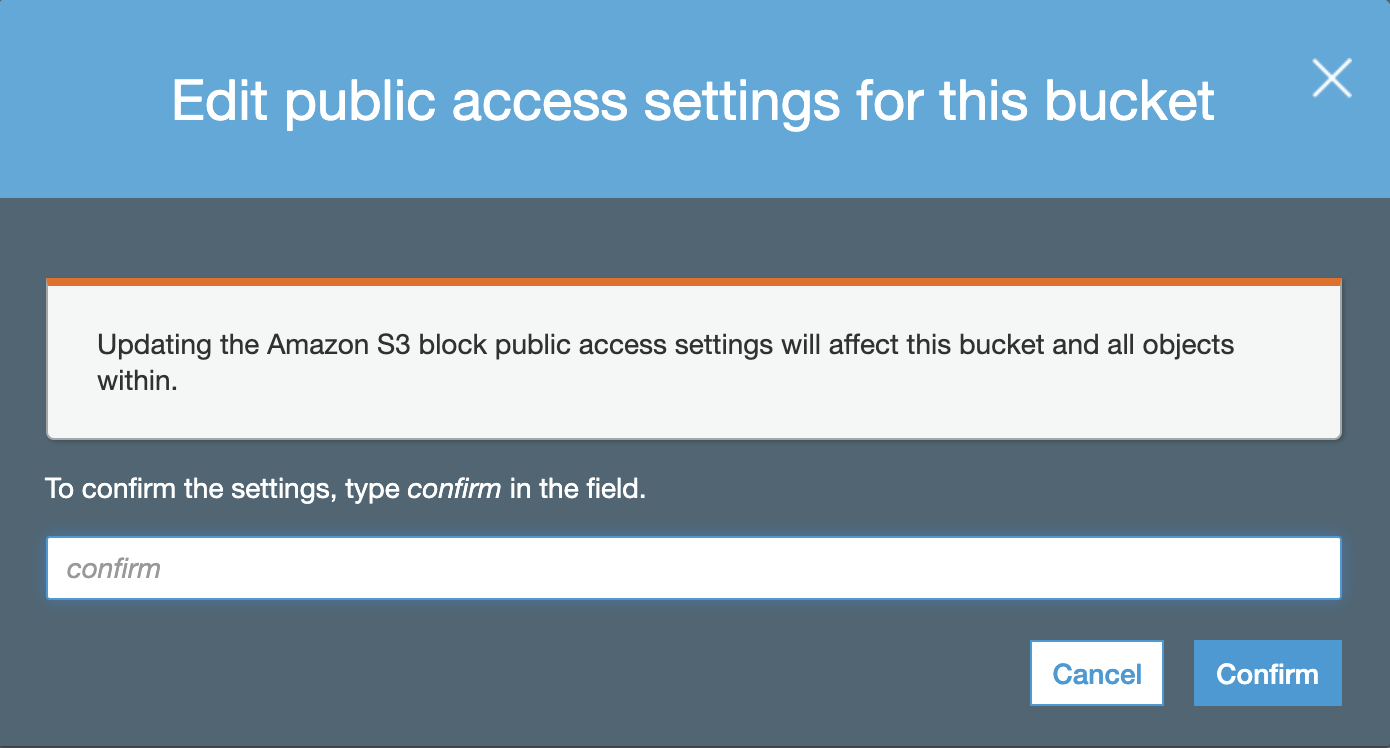
With those deselected, we can make a bucket policy. From the Permissions tab, select the “Bucket Policy”. Paste the following in to the window and click Save. Be sure to update the Resource to have the ARN for your new bucket.
1 | { |
While on the Permissions tab, go back to “Public access settings” and click the Edit button again. Check the following and click Save.
- Block new public bucket policies
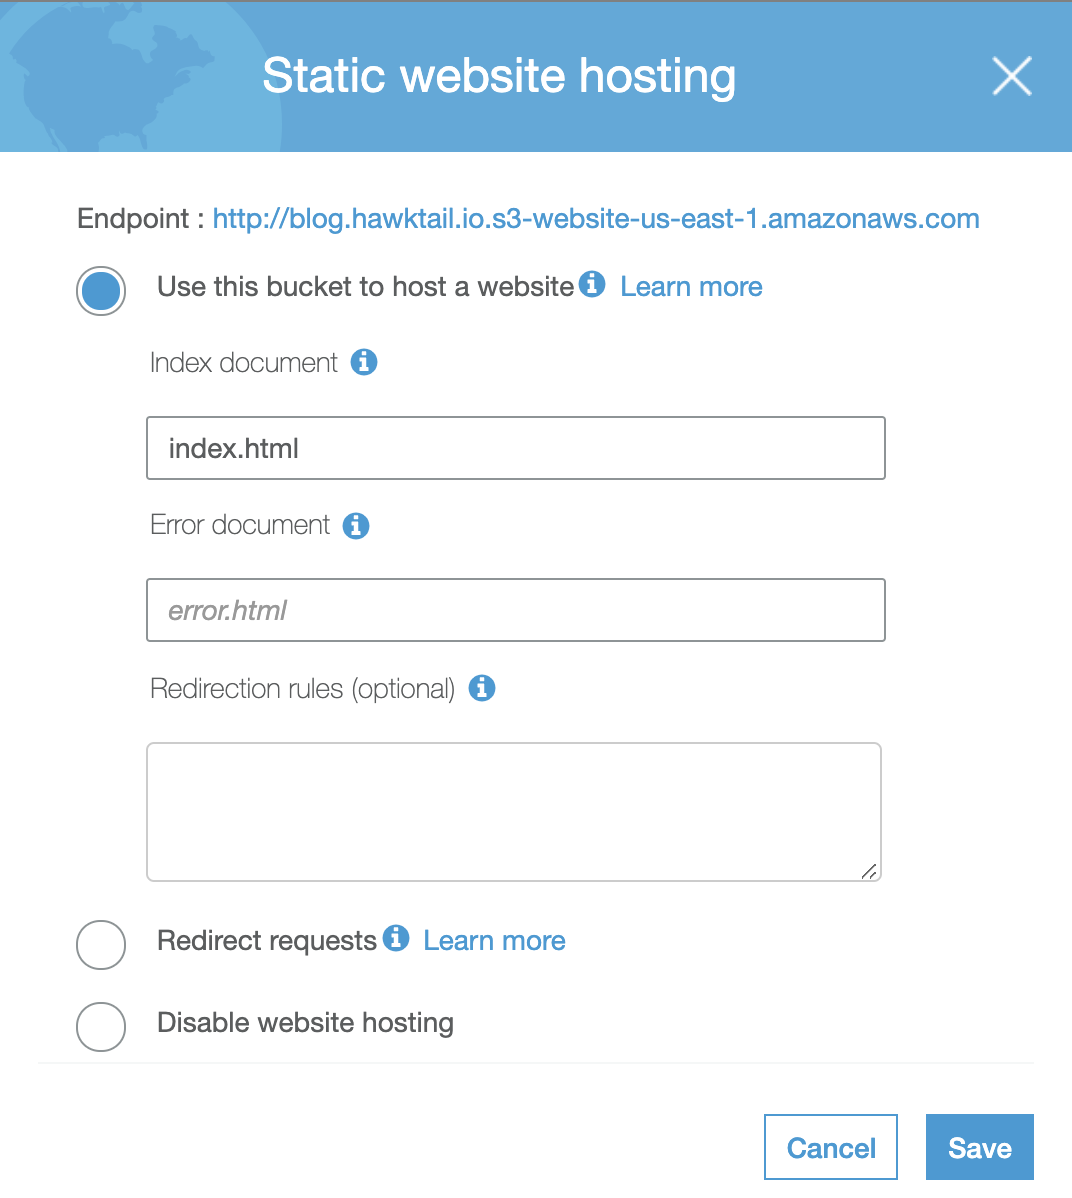
Go to the Propeties tab and select “Static website hosting”. Click the button for “Use this bucket to host a website” and for “Index document” type index.html and click Save.
Next, we will need an AWS user for CircleCI to perform tasks that we’ll be discussing a little later.
- Go to the IAM Console and click Add User.
- For “User name”, give it something to identify that its purpose is for CircleCI usage.
- For “Access type”, check Programmatic access.
- At the bottom of the screen click “Next: Permissions”.
- Skip adding the user to a Group, click “Next: Tags”.
- Skip adding Tags, click “Next: Review”.
- Finally click Create user.
- Click Download .csv as you will need to enter the
Access key IDandSecret access keyin to CircleCI later. - Click Close at the bottom of the screen
Now we’ll have to add a policy to the newly created user.
- Click on the user and select Add inline policy.
- Select the JSON tab and replace what’s there with the following:
1
2
3
4
5
6
7
8
9
10
11
12
13
14
15
16
17{
"Version": "2012-10-17",
"Statement": [
{
"Sid": "",
"Effect": "Allow",
"Action": "s3:PutObject",
"Resource": "arn:aws:s3:::<bucket_name>/*"
},
{
"Sid": "",
"Effect": "Allow",
"Action": "s3:ListBucket",
"Resource": "arn:aws:s3:::<bucket_name>"
}
]
} - Click on “Review policy”
- Provide the policy with a Name and then click “Create policy”
We have one last item left for AWS and that’s to add a Route 53 Record.
- Go to the Hosted Zone that your bucket would be associated with
- Click on Create Record Set
- Name - Enter the appropriate value based on your bucket name
- Type - This should be an A record
- Alias - Yes
- Alias Target - Select your bucket and it should resolve to something similar to this
s3-website-us-east-1.amazonaws.com - Click Create
AWS alternate config
Instead of doing all the steps listed above, if you use Terraform, see my repo hexo-example/terraform to speed up the process a little.
Or if you prefer CloudFormation, try hexo-example/cloudformation.
CircleCI
The final piece is to automate the deployment of your blog to S3 each time you push changes to Github. The following yml will need placed at <project_root>/.circleci/config.yml. Be sure to replace the placeholders with the appropriate values.
1 | version: 2.1 |
Add AWs Credentials to CircleCI
Sign in to CircleCI with your Github account. You will need to go to the Settings for your project.
- Click on Jobs on left hand side
- Click on the Cog for this project
- On the left you will see AWS Permissions, click on that
- Open the CSV file you saved from above
- Enter Access Key Id
- Enter Secret Access Key
Then push all the code to GitHub. Shortly after the CircleCI job completes, you should see your blog and the URL you created in the Route 53 steps.